
Microgreens Made Easy: A Step-by-Step Guide for High-Yield Harvests
Whether you’re a first-time gardener or an experienced grower, microgreens offer a fast-growing, space-efficient way to enjoy a continuous supply of fresh, nutrient-packed greens. These small but powerful plants bring vibrant flavor, color, and essential nutrients to any meal—and best of all, they’re incredibly easy to grow at home.
This step-by-step guide will walk you through everything you need to know to achieve a successful, high-yield microgreens harvest. From selecting the best seeds to proper care, growing techniques, and harvesting tips, you’ll be well on your way to enjoying homegrown superfoods year-round.
Why Grow Microgreens?
Microgreens are not just miniature versions of vegetables; they are super-nutrients. Research shows that microgreens can contain 4 to 40 times more nutrients than their fully matured counterparts. These compact greens are loaded with essential vitamins, minerals, antioxidants, and phytonutrients, making them a valuable addition to any diet.
Health Advantages of Eating Microgreens
- Boosted Immunity
Rich in vitamins A, C, and E, microgreens help strengthen the immune system and protect against illness. - Digestive Support
Their natural fiber content supports gut health, improves digestion, and promotes regularity. - Natural Energy Boost
Packed with phytonutrients, microgreens combat fatigue and help sustain energy throughout the day. - Cardiovascular Health
Varieties like broccoli and kale microgreens contain heart-friendly compounds that support circulation and lower the risk of heart disease. - Anti-Inflammatory Effects
Abundant antioxidants help reduce oxidative stress and inflammation, key contributors to chronic disease.
Microgreens are an easy, flavorful way to enhance overall wellness. Whether blended into smoothies, tossed into salads, layered in sandwiches, or sprinkled over soups, they offer both taste and health in every bite.
A Sustainable and Cost-Effective Superfood
Microgreens aren’t just good for your body—they’re also great for the planet and your wallet. Their small footprint and minimal requirements make them an ideal solution for urban living and eco-conscious lifestyles.
Sustainability Benefits of Microgreens
- Less Food Waste
Harvest only what you need, when you need it—reducing spoilage and kitchen waste. - Lower Carbon Footprint
Growing microgreens at home eliminates the emissions tied to transporting store-bought produce. - Significant Cost Savings
While store-bought microgreens can be expensive, growing them at home costs only a fraction and yields far more. - Minimal Resource Use
Microgreens require far less water, soil, and space than traditional crops, making them a more sustainable alternative to large-scale farming.
Step 1: Choosing the Right Microgreens Seeds

Popular Microgreens Varieties
Selecting seeds is the beginning of a fruitful microgreens crop. Some popular microgreens to choose from are:
- Mild Flavors: Sunflower and pea shoots—a good choice for new growers and wonderful in salads.
- Spicy & Peppery: Radish and arugula give foods a zesty zing.
- Nutty & Earthy: Broccoli and kale are packed with antioxidants and excellent for general well-being.
Factors to Consider When Selecting Seeds
- Organic & Non-GMO: Use organic, non-GMO seeds to have healthy, chemical-free production.
- High Germination Rate: Read seed packets for germination percentages—the higher, the better yields.
- Flavor Preference & Nutritional Needs: Choose for flavor and nutrition benefits desired.
Why Balance Farms Seeds Stand Out
Balance Farms offers top-class, locally harvested, and organically grown seeds specifically engineered to provide high yield and tastier microgreens. If you are on the hunt for the best, you should go for the seeds available at Balance Farms.
Step 2: Gathering Your Growing Supplies
Essential Tools for a Successful Microgreens Harvest
To achieve a healthy and productive microgreens crop, having the right tools in place is key. Here are the essential items you’ll need to get started:
- Shallow Trays or Containers with Drainage Holes
Choose trays that are shallow and include proper drainage to prevent water accumulation, which can cause root rot and mold issues. - Growing Medium
Use a high-quality potting mix or hydroponic growing mats as the base for your seeds. These provide the necessary support and moisture retention for germination and healthy growth. - Spray Bottle
A fine mist spray bottle is ideal for watering your microgreens. It allows gentle, even watering without disturbing the seeds or compacting the soil. - Light Source
Microgreens need adequate light for strong, upright growth. Place your trays near a bright, sunny window or use a full-spectrum grow light to provide 12–16 hours of light per day. - Air Circulation (Optional but Recommended)
A small fan can help maintain proper airflow around your growing area. This reduces humidity buildup and helps prevent mold or fungal growth on your greens.
Choosing the Right Growing Medium
Selecting the best growing medium is an important step toward a successful microgreens harvest. Each option offers unique benefits depending on your growing conditions and personal preferences. Here are the three primary types:
- Soil
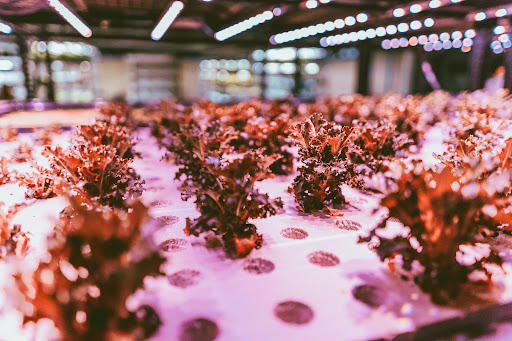
The most traditional and widely used medium, soil provides natural nutrients that support robust growth and rich, full flavors. It’s ideal for most microgreen varieties and is especially effective for home growers looking for high yields and vibrant taste. - Hydroponics
This soilless system uses water-based trays or growing mats (often made from synthetic materials) and is excellent for producing clean, mess-free microgreens. It’s a great choice for those who want minimal cleanup or are working in compact indoor spaces. - Coco Coir or Hemp Mats
These eco-friendly, biodegradable mats offer a sustainable alternative to soil and synthetic hydroponic mats. They hold water well, provide a stable growing surface, and are particularly suited for those looking for an environmentally conscious option.
Step 3: Planting Microgreens for Maximum Yield
Preparing the Growing Tray
Begin by covering your shallow tray with 1-2 inches of dampened soil or growing medium of your preference. Spread the soil out and gently firm it to create a smooth, flat surface. Drainage is critical—your tray must be provided with holes so that it doesn’t waterlog, creating conditions for mold and stunted growth. For hydroponic mats, they need to be pre-soaked in water prior to being inserted into the tray. Gently water the surface with water to provide a humid condition for fast germination.
Sowing the Seeds
Seed your microgreen seeds evenly across the surface of the soil. Steer clear of crowding, as dense seeds can result in weak airflow, mold, and sparse plants. For a standard guideline, shoot for one even layer of seeds without too much overlap. When scattering, lightly press the seeds into the soil with your hand or a flat object—but don’t bury them. Gently mist the tray once more to give it moisture so seeds come into good contact with the soil.
Providing Ideal Growing Conditions
Position the tray in indirect sunlight or under grow lights for a minimum of 12-16 hours daily. Keep the temperature between 65-75°F for best germination. To facilitate seed sprouting, cover the tray with a humidity dome, plastic lid, or a second tray for the initial 2-3 days. The dark, moist conditions promote good root growth. After sprouting, remove the cover and let them have light to encourage good growth.
Step 4: Caring for Your Microgreens
Watering Techniques for Optimal Growth
Healthy microgreens need proper watering. Mist the soil lightly with a spray bottle to keep the seeds and sprouts moist but not waterlogged. Do not overwater, as this can lead to mold and root rot. Instead of directly pouring water, bottom water by adding a small quantity of water to the tray below and letting the soil slowly absorb moisture. Maintain the soil moist but not waterlogged at all times during the growth process.
Light and Air Circulation
Microgreens need 12-16 hours of light per day to grow sturdy stems and colorful leaves. Put them under grow lights or in front of a bright window with indirect sunlight. Keep good airflow to avoid moisture accumulation—use a small fan to enhance airflow. Also, rotate the trays every few days to provide even light exposure and encourage even growth.
Troubleshooting Common Problems
- Mold Growth: Improve airflow, lower humidity, and don’t overwater.
- Leggy Growth: Expose the plants to more light to promote strong stems.
- Yellow Leaves: Inspect whether the plants are well-lit and well-nourished. A faint color is usually a sign of poor care.
Step 5: Picking Your Microgreens
When Do Microgreens Become Ready to Pick?
- Microgreens are usually ready in 7-14 days.
- Check for the initial batch of true leaves.
- Harvest early for less pungent flavor; wait longer for pungency.
How to Harvest for Best Results
- Use clean scissors and snip above the soil line.
- Rinse lightly and dry with a paper towel.
- Keep in an airtight container with a paper towel to soak up moisture and keep fresh for a longer period.
Delicious Ways to Enjoy Your Microgreens Harvest
Simple and Creative Meal Ideas
- Add to salads for an added nutrient punch.
- Throw into sandwiches and wraps to add texture and flavor.
- Mix into smoothies for a vitamin boost.
- Sprinkle over soups, omelets, or grain bowls.
- Create microgreens pesto or mix into sauces for an added fresh flavor.
Cooking Tips for Preserving Nutrients
- Consume raw for optimum benefits.
- Lightly steam for a tender texture without sacrificing excess nutrients.
Final Thoughts on Growing a High-Yield Microgreens Harvest
Microgreens are an accessible, sustainable, and nutrient-dense addition to any lifestyle. With minimal space and effort, you can grow your own fresh greens right at home—no garden required. By selecting high-quality seeds, using the right tools and growing medium, and following a few simple steps, anyone can enjoy a successful, high-yield microgreens harvest.
Begin growing your microgreens today with Balance Farms , your trusted source for premium, organic microgreen seeds. With Balance Farms, you can count on freshness, quality, and flavor in every leaf.
Happy growing!